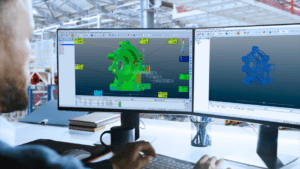
Point cloud technology refers to the use of a set of data points in a 3D coordinate system, which is commonly defined by X, Y and Z axes. From a metrological standpoint, the actual points in a point cloud represent those X, Y and Z geometric coordinates for each single point. All together, these point clouds can be used as they are (raw) or filtered to create shapes and surfaces that can be compared with a nominal CAD reference, for example.
3D laser scanners and Ladar technologies are used to create such point clouds which aid the measurement process to provide highly accurate results. Since 2000, optical sensors came into the metrology industry that enabled laser scanning systems to gather high-density point clouds in more and more faster time windows.
It soon emerged that scanning parts helped deliver faster measurement results than probing devices and a subsequent demand arose for there to be a 3D metrology software solution that works with high-density point clouds.
What are the challenges of using point clouds ?
What also became clear to metrologists was that point cloud technology comes with a key inconvenience: measuring touch probes can cover small or large surfaces but offer a low density of measurement data per unit of time. While scanning devices can work with high-density point clouds per units of time but cannot today offer the same accuracy level as measuring touch probes.
There are scanning devices that work with both high- density point cloud data, at high accuracy levels, but these are unable to cover larger surface areas and are more dedicated to analyzing small local surface textures rather than serve 3D metrology requirements.
Besides this loophole, there are a couple of other challenges such as:
- Meeting higher levels of accuracy using optical sensors and laser systems on larger surfaces with the right 3D metrology software solution.
• Being able to leverage laser systems to measure certain surfaces such as shiny surfaces, like car mirrors for example, and generate the measurement data via point clouds.
Which impact and benefits of using point clouds for metrological purposes ?
Based on experience, it wouldn’t be wrong to state that 3D point cloud technology is very much in demand and at least half the global metrology sector currently leverages it.
Before its advent in the metrology industry, operators were looking to see if every single part on production lines could be measured. Dedicated measurement laboratories were used with fixed controls (e.g., temperature, humidity levels, etc.) to measure samples of parts. Then, statistical analysis was performed to assume measurements of the rest of the parts.
The application of point clouds has increased for a certain level of precision, accuracy, speed and quality of the measurement data derived through the use of 3D scanning and photogrammetry devices. In addition, point clouds offers measurement capabilities without damaging the actuals parts, because these devices do not need to make contact with the parts during the measurement process.
This has proved extremely beneficial in improving productivity levels and saving time when measuring large volumes of parts within tight deadlines.
Why using the right 3D metrology software is important ?
The right 3D metrology software solution will merge point cloud data with CAD files into the same place to compare, contrast and analyze measurements via color mapping – a feature that makes it easier and interesting for metrology professionals to read and interpret the data.
It should have multiple functionalities to be able to detect precise measurements, i.e., particular edges or boundaries, bores and other such intricate dimensions that a part could typically have.
By using the right algorithms, the right 3D metrology software solution should be able to make it easier to extrapolate and identify the correct measurement data which the point cloud has detected. Otherwise, this can sometimes be problematic when it comes to working with high-density point clouds, which is often the case, as the parts or surfaces measured are large in area and size.
However, when used correctly, point clouds can help to present the relevant data in the shortest amount of time possible, which helps when working with complex parts or larger volumes of parts.

